Pro Tool’s Beat Detective is a powerful tool to have under your belt. From editing audio and MIDI tracks, to generating complete tempo maps and groove templates based on a performance, Beat Detective can be a real life and time saver.
Contrary to popular belief, the results need not be robotic or unnatural. When used properly, you can add a ton of consistency and weight to any drum or percussion performance without compromising an ounce of groove and feeling.
In this two-part series, we’ll take you from the very basic aspects of Beat Detective to some advanced workflows and strategies to use in busy and demanding studio situations.
Profile of the Detective
Beat Detective is found under the menu “Event”, or more quickly, using the shortcut Cmd+8on a Mac or Ctrl+8 on a Windows-based machine, using the numeric pad.
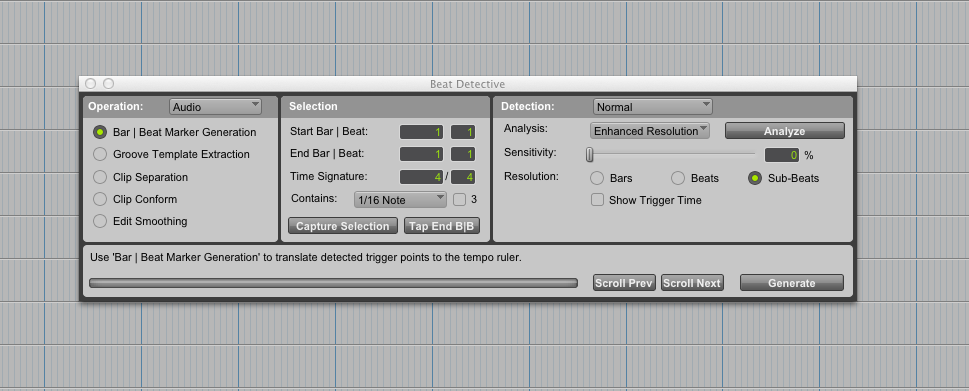
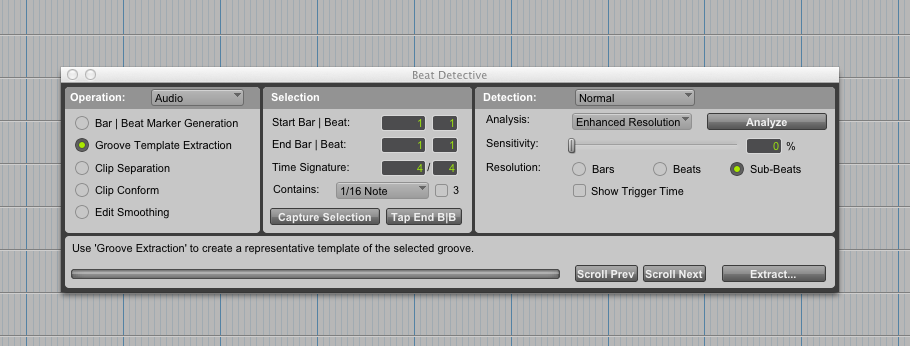
From left to right, the three main ares of the Beat Detective window are Operation, Selection and Detection.
The main window is divided into three areas: Operation, Selection and Detection. Depending on the operating mode selected, some of the fields under other sections will vary.
Don’t let all the options you’ll see here intimidate you. Beat Detective can be a powerful and complex tool, but once you understand what these controls do, it’s fairly straightforward to edit given performance, or use it as a groove reference in editing others.
Operating Modes
Conforming a drum track to the grid is probably the best-known use of Beat Detective (this is operation mode #3, discussed below), but that’s not all it can do.
Imagine you just recorded a killer drum take, with the perfect groove and feeling, and now you’d like to combine it with some loops and MIDI tracks to enhance your rhythm arrangement.
If you want to preserve the exact timing and feeling of the drums, you need to accommodate the grid around the drum tracks, and that’s precisely what the first operation mode “Bar | Beat Marker Generation” allows you to do.
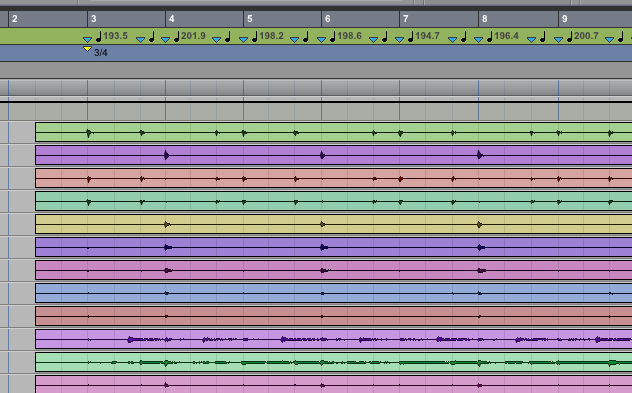
Beat Detective can be used to generate useful tempo maps, even if the original performance wasn’t played to a click.
In the image above, Beat Detective was used to generate Bar and Beat Markers and extrapolate the tempo between them, creating a new tempo map that follows the performance.
This can be done even if a click reference wasn’t used when recording the drums/ Having this tempo map available can be extremely useful, because it facilitates the editing of other tracks, and the use of timed automation and tempo based effects. With our tempo mapped out in this way, there’s no need to tap and program in different delay time settings throughout the song, no matter how often the or dramatically the tempo changes.
In essence, you have made it so that the internal tempo clock of Pro Tools will follow the original performance. This can even be handy in applying new overdubs, as when you now play the native click of Pro Tools, you’ll hear it follow along to the performance making playing along to count-ins and tempo changes even easier.
Groove Template Extraction mode.
The second operation mode, “Groove Template Extraction” is similar to the first one, but with an important difference: It allows you to save the timing and groove information of the original performance in a “Groove Template” that you can later apply to other instruments.
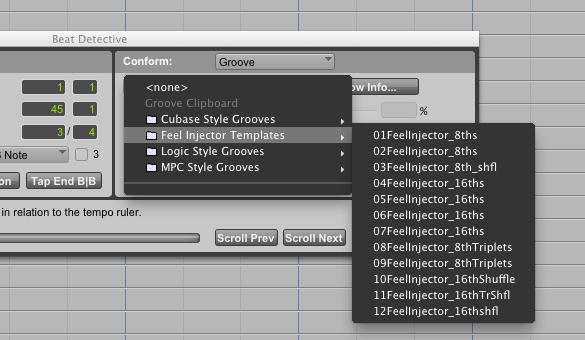
Some of the stock groove templates in Pro Tools.
The two first operating modes are available for both audio and MIDI tracks; the third one “Clip Separation” is available only for audio material.

Clip Separation mode.
Clip Separation is probably the best-known feature of Beat Detective. It allows you to identify transients in the audio material and then slice it at those points.
Once all these hits have been isolated, they can be conformed to the grid—or to a groove template—using the fourth mode: “Clip Conform”.
Lastly, the fifth mode “Edit Smoothing” can be used to “cure” all your edit points, filling in the gaps by creating cross-fades to avoid clicks and pops.
If you feel a little overwhelmed, fear not. Everything will become clearer with a practical case.
In the Field: Editing Drums with Beat Detective
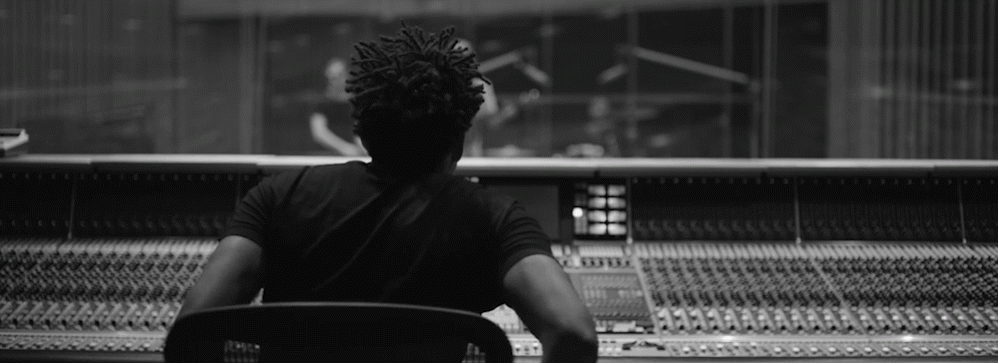
Let’s say we have a multi-track recording of a drum performance with several microphones for kick and snare, plus overhead, room and spot mics. Your recording was done using the internal click in Pro Tools as a reference.
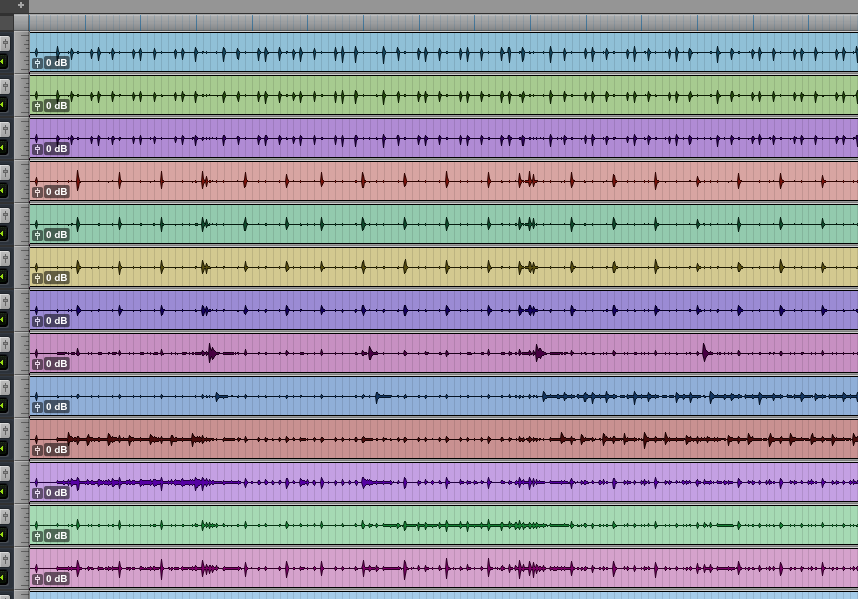
A reasonably solid performance, ready for editing.
The performance is solid, nut we’d like to tighten it a notch to avoid flamming and timing issues when it’s combined with some percussion loops.
It is true that a little touch of Beat Detective can prevent a lot of headaches, but a little toomuch can do more harm than good. There’s a fine line here between natural, solid groove and an inappropriately robotic one.
Usually, the best way to obtain natural-sounding results is by just editing the bigger subdivisions of the pieces that define the main rhythm (usually kick and snare), letting secondary/grace notes and other elements fall into place.
If you have several microphones for the kick and snare, you’ll get the best results using the “cleaner” and closer microphones to do this—usually “kick in” and “snare top”.
This article can be found on sonicscoop.com